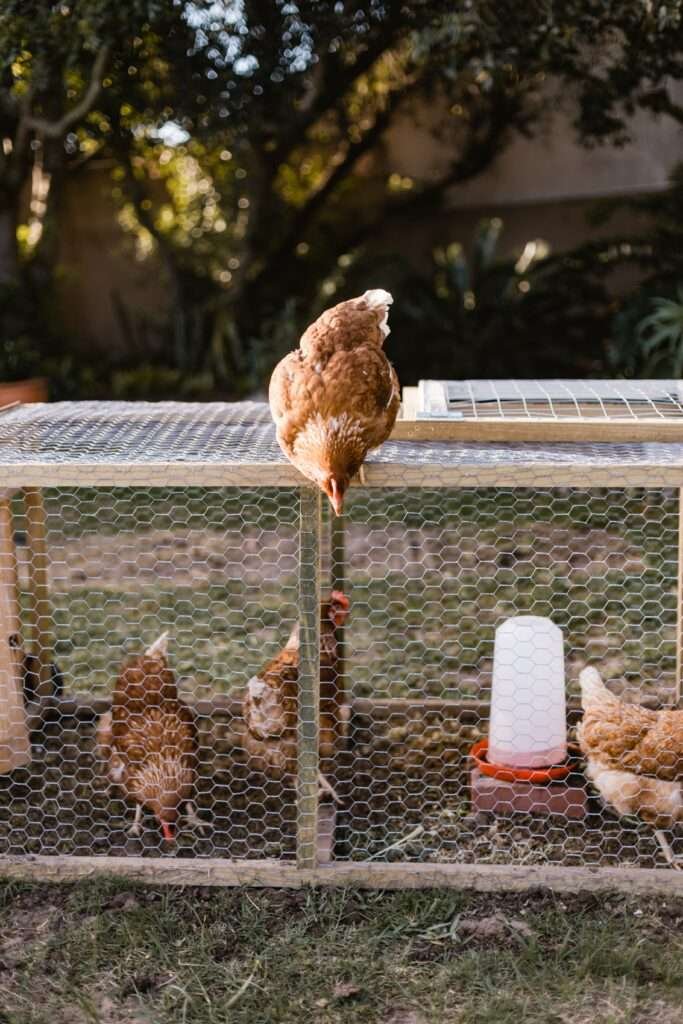
Owning a flock of chickens offers a plethora of benefits, from a sustainable source of fresh eggs to the joy of tending to these delightful creatures. However, building a chicken coop can often be a daunting and expensive endeavor. The good news is that with a bit of resourcefulness and creativity, you can construct a functional and budget-friendly chicken coop without compromising on quality. In this comprehensive guide, we will walk you through the step-by-step process of building a cost-effective chicken coop that meets all your flock’s needs while keeping your wallet happy.
Planning For Building a Chicken Coop On a Budget
Before embarking on your coop-building journey, careful planning is essential. Building your own chicken coop offers significant cost savings and the opportunity to customize the design to suit your specific requirements. Setting a budget and outlining the key components of the coop will guide you throughout the construction process.
To begin, consider the size of your flock and the available space in your backyard. Determining the coop size is crucial to ensure your chickens have enough room to move around comfortably. As a general rule, allow 2-3 square feet per chicken inside the coop and 8-10 square feet per chicken in an outdoor run. A larger flock may require a more spacious coop, while a smaller flock can thrive in a compact setup.
Next, decide on the coop design that best suits your needs. There are various designs suitable for small, medium, and larger flocks. You can choose from classic rectangular coops, A-frame designs, or even repurpose an existing structure like a garden shed or playhouse. Each design has its advantages in terms of space efficiency and cost-effectiveness.
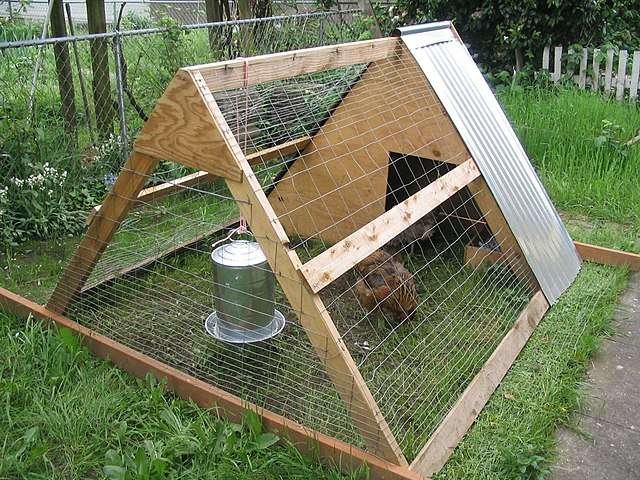
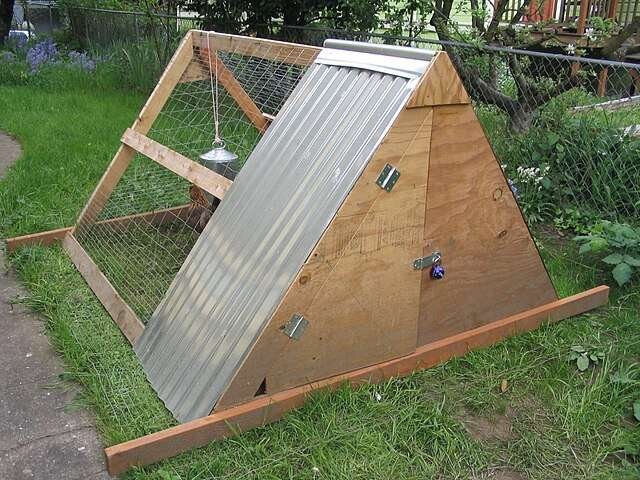
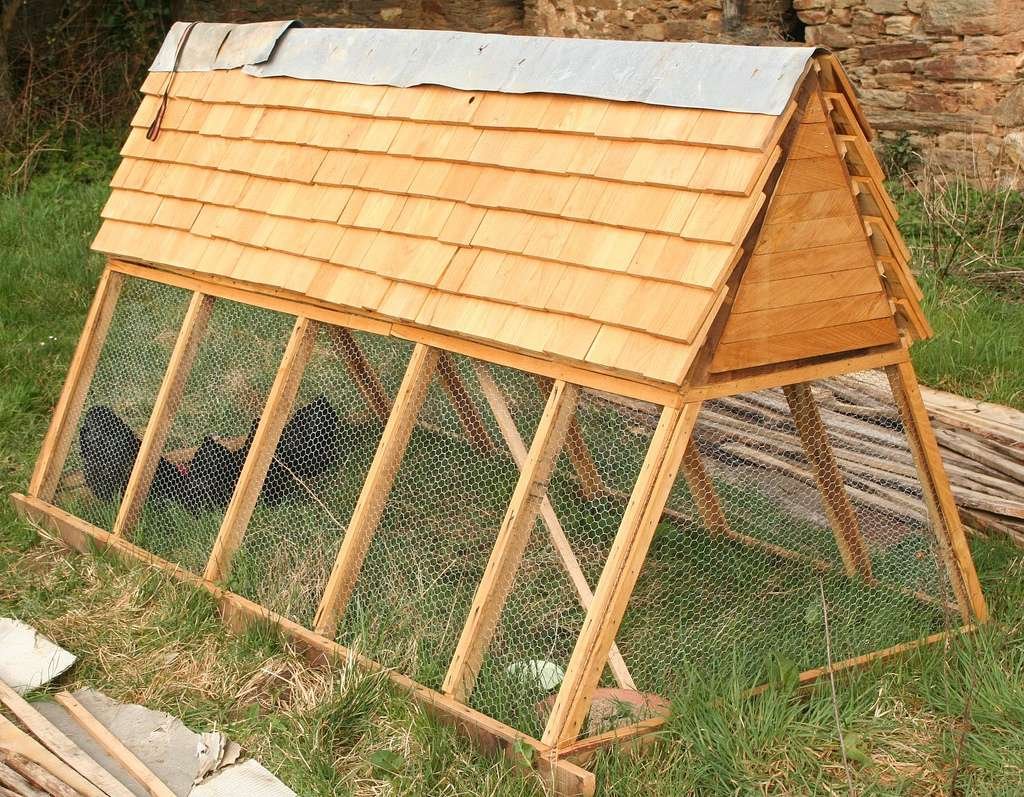
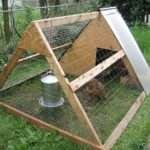
For this guide, we will present a simple and versatile A-frame design that is perfect for a small to medium-sized flock. The A-frame coop provides ample headroom and floor space, making it an ideal choice for building a chicken coop on a budget.
Determining Coop Size and Design
The A-frame coop design is an excellent option for its cost-effectiveness and adaptability. The triangular shape not only offers adequate space for chickens but also allows for efficient rainwater runoff and easy construction. This design works well for up to 6-8 chickens, depending on their size and breed.
Materials Needed for the A-Frame Coop:
- Pressure-treated lumber for framing (2×4 and 2×2)
- Exterior-grade plywood for walls and roofing
- Galvanized screws or nails
- Door hinges and latch
- Chicken wire or hardware cloth for windows and ventilation
- Roofing material (corrugated metal or asphalt shingles)
- Nesting box materials (optional)
- Wood or PVC pipe for roosts
Tools Required:
- Circular saw or handsaw
- Power drill with screwdriver bits
- Hammer or nail gun
- Measuring tape
- Carpenter’s square
- Level
- Pencil or marker
A-Frame Coop Construction Steps:
Step 1: Base and Frame
- Begin by constructing the base frame using pressure-treated lumber. Cut two 2x4s to the desired length of the coop and two more for the width. Connect the pieces with screws or nails to form a rectangle.
- Cut two 2x2s to the length of the coop and attach them diagonally between the corners to create the A-frame structure. Ensure the frame is level and square before proceeding.
Step 2: Walls and Roof
- Cut the exterior-grade plywood to fit the sides and roof of the coop. Attach the plywood to the frame using screws or nails. For the roof, create an overhang on both sides of the coop to protect the walls from rainwater runoff.
Step 3: Ventilation and Windows
- Cut openings for windows on each side of the coop and cover them with chicken wire or hardware cloth. Ventilation is crucial for your chickens’ health, so consider adding vents near the top of the coop to ensure adequate air circulation.
Step 4: Door and Latch
- Cut an opening for the coop’s door on one side and attach it with hinges. Install a latch or lock to keep the door securely closed.
Step 5: Roofing
- Add the roofing material of your choice, either corrugated metal or asphalt shingles. Ensure the roof is properly secured to prevent leaks.
Step 6: Nesting Boxes and Roosts
- If desired, construct nesting boxes inside the coop using plywood. Provide one nesting box for every 3-4 hens.
- Add roosts using wooden dowels or PVC pipes. Place them higher than the nesting boxes to encourage chickens to sleep there at night.
By following these steps, you can create a functional and cost-effective A-frame chicken coop that will provide a comfortable and secure home for your flock. With the right planning and materials, you’ll enjoy the satisfaction of building a coop that perfectly fits your budget and your chickens’ needs.
Utilizing Available Materials When Building a Chicken Coop on a Budget
One of the most effective ways to build a budget-friendly chicken coop is to utilize materials that you may already have or can obtain at little to no cost. Repurposing and upcycling materials not only save money but also contribute to a sustainable and eco-friendly approach to coop construction.
1. Salvageable Lumber and Pallets: Check your garage, shed, or local recycling centers for salvaged lumber or wooden pallets. These can be excellent sources of free or inexpensive materials for building the coop’s frame, nesting boxes, and roosts. Be sure to inspect the wood for any signs of rot or damage before using it in your coop.
2. Recycled Windows and Doors: Old windows and doors can be repurposed as functional and cost-effective components of your coop. Not only do they provide natural light and ventilation, but they can also enhance the aesthetic appeal of the coop. Check salvage yards, online marketplaces, or local classified ads for affordable or even free windows and doors.
3. Scrap Building Materials: Visit construction sites or lumberyards to inquire about scrap or leftover building materials that are often sold at discounted prices. Plywood offcuts, extra roofing materials, or hardware may be available at a fraction of the original cost.
4. Reused Hardware: Save money by reusing hardware such as hinges, latches, and screws from old furniture or discarded items. Cleaning and refurbishing these items can make them suitable for use in your coop.
5. Natural and DIY Bedding Materials: Instead of purchasing expensive bedding materials, consider using natural alternatives like straw, dried leaves, or grass clippings. These materials are often abundant and readily available, making them a budget-friendly choice.
Cost-Effective Construction Techniques
Building a chicken coop on a budget requires smart construction techniques that prioritize functionality without compromising durability. Here are some cost-effective approaches:
1. Efficient Framing: Use precise measurements and cutting techniques to minimize waste when framing the coop. A well-designed frame ensures stability and longevity.
2. Budget-Friendly Roofing: Corrugated metal roofing is an economical and durable option for your coop. Alternatively, asphalt shingles can be a cost-effective choice when purchased in bundles.
3. Space-Saving Nesting Boxes: Optimize space by building external nesting boxes that can be accessed from outside the coop. This design reduces the need for additional materials and simplifies egg collection.
4. DIY Roosts and Perches: Instead of purchasing pre-made roosts, consider using wooden dowels or PVC pipes. These materials are affordable and easy to work with.
5. Simple Ventilation Solutions: Ventilation is crucial for a healthy coop environment. Create vents using recycled materials such as old screen doors or window shutters.
Essential Features for Building a Chicken Coop on a Budget
While building a chicken coop on a budget, it’s essential not to compromise on essential features that ensure your chickens’ well-being and comfort.
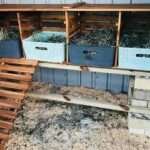
1. Nesting Boxes: Provide one nesting box for every 3-4 hens. Repurposed crates or wooden boxes can make excellent nesting boxes. Ensure each box is filled with straw or shavings for a cozy nesting area.
2. Roosts: Chickens need a comfortable and elevated spot to sleep at night. Roosts can be made from wooden dowels or PVC pipes, positioned higher than the nesting boxes.
3. Proper Ventilation: Adequate ventilation prevents moisture buildup and reduces the risk of respiratory issues in your flock. Install vents or windows at the coop’s higher points to allow warm, moist air to escape.
4. Natural Light: Maximize natural light by adding windows or using transparent roofing materials. Sunlight not only enhances the coop’s environment but also boosts egg-laying productivity.
5. Easy Access Doors: Ensure the coop has at least one large access door for easy cleaning, egg collection, and general maintenance. A well-placed door will save time and effort.
Ventilation and Climate Considerations
Proper ventilation is vital for your chickens’ health, especially during hot and humid weather. In warm climates, you can create cross-ventilation by placing vents on opposite walls. In colder regions, positioning the coop to face the sun can provide extra warmth during winter months.
To save on costs, consider using scrap materials to build vents or installing simple vents made from recycled materials. Remember that good ventilation not only maintains a comfortable temperature but also reduces ammonia buildup from chicken droppings, promoting a healthier environment for your flock.
Flooring and Bedding Options
Choosing the right flooring material for your coop can impact cleanliness, comfort, and ease of maintenance. Here are some budget-friendly options:
1. Dirt or Sand: Inexpensive and easily accessible, dirt or sand can be used as the coop’s flooring. These materials are easy to clean and maintain, but you may need to replenish them regularly.
2. Wood Shavings or Straw: Wood shavings or straw make excellent bedding choices that provide a comfortable and absorbent surface for your chickens. You can often find them at affordable prices, especially in rural areas.
3. Recycled Paper Products: Some chicken keepers use shredded newspaper or recycled paper products as bedding, which can be both cost-effective and eco-friendly.
4. Deep Litter Method: Consider implementing the deep litter method, where layers of straw or wood shavings are allowed to compost over time. This approach creates a self-sustaining bedding system that reduces the need for frequent cleaning.
Remember to keep the bedding clean and dry, as moist bedding can lead to health problems and unpleasant odors. Regularly clean the coop to prevent the buildup of waste, ensuring a hygienic and comfortable environment for your chickens.
Coop Security and Predators
Ensuring the safety of your chickens is of utmost importance, regardless of your budget. Predators can be a threat to your flock, even in urban or suburban areas. To protect your chickens without breaking the bank, consider these cost-effective security measures:
1. Sturdy Fencing: Invest in durable chicken wire or hardware cloth to enclose the outdoor run securely. Dig the wire a few inches into the ground to deter burrowing predators.
2. Reinforced Doors: Strengthen coop doors with metal plates or brackets to prevent predators from prying them open. Consider adding a latch or lock to secure the doors at night.
3. Predator-Proof Latches: Use carabiner-style latches or barrel bolts for coop doors. These low-cost options offer an extra layer of protection against smart and determined predators.
4. Elevated Coop: Raising the coop slightly off the ground can discourage pests and rodents from nesting underneath. This design element is budget-friendly and effective.
5. Nighttime Lockdown: Ensure all chickens are safely inside the coop at night and close the doors securely. Predators are most active during the early morning and evening hours.
Putting It All Together: Building a Chicken Coop On a Budget
Now that you have planned and gathered the materials, it’s time to put it all together. Here is a step-by-step guide to building your budget-friendly chicken coop:
Step 1: Build the Base and Frame
- Construct the base frame using pressure-treated lumber, following the dimensions you planned earlier.
- Attach the 2x2s diagonally between the corners to create the A-frame structure. Ensure everything is level and square.
Step 2: Install Walls and Roof
- Cut the exterior-grade plywood to fit the sides and roof of the coop. Attach the plywood to the frame with screws or nails.
- Create an overhang on both sides of the coop to protect the walls from rainwater runoff.
Step 3: Add Ventilation and Windows
- Cut openings for windows on each side of the coop and cover them with chicken wire or hardware cloth. Install vents near the top of the coop for proper air circulation.
Step 4: Install Door and Roofing
- Cut an opening for the coop’s door on one side and attach it with hinges. Install a latch or lock to keep the door securely closed at night.
- Add the roofing material of your choice, securing it well to prevent leaks.
Step 5: Build Nesting Boxes and Roosts
- Construct external nesting boxes using plywood or repurposed crates. Provide one box for every 3-4 hens.
- Add roosts using wooden dowels or PVC pipes, positioning them higher than the nesting boxes.
Step 6: Choose Flooring and Bedding
- Select the flooring material of your choice, such as dirt, sand, wood shavings, or straw.
- Place the bedding material on the coop floor to provide a comfortable and absorbent surface.
Step 7: Secure the Coop
- Use sturdy fencing or hardware cloth to enclose the outdoor run securely.
- Strengthen coop doors with metal plates or brackets and add predator-proof latches.
Cost Estimates and Final Thoughts
Building a chicken coop a budget can vary in cost depending on the size, materials used, and local prices. On average, you can construct a small to medium-sized coop for approximately $150 to $300, while larger coops may cost up to $500.
Remember that the true value of a budget-friendly chicken coop lies not only in the money saved but also in the rewarding experience of creating a safe and comfortable home for your feathered friends. Building your coop allows you to tailor it to your chickens’ needs and your backyard space.
As you embark on this DIY adventure, take pride in your resourcefulness and creativity. Embrace the challenge of constructing a functional coop on a budget, and your chickens will reward you with fresh eggs and their charming antics.
Always prioritize your chickens’ well-being and security, even if it means investing a bit more in quality materials or predator-proofing measures. With proper planning and careful construction, your budget-friendly chicken coop will serve as a thriving sanctuary for your flock for years to come.
Happy coop building, and may your feathered companions enjoy their new home in your backyard oasis!
Related posts:
 The Chicken Coop: Ultimate Build of 2023
 Nesting Boxes for Chickens: Design, Types, and Maintenance
 The Best Automatic Chicken Coop Doors: Should you get one?
The Best Chicken Shelter: Structures and Cost Considerations
The Best Automatic Chicken Coop Doors: Should you get one?
The Best Chicken Shelter: Structures and Cost Considerations
 Simplify Chicken Raising: The Ultimate Time Savers
 Mucking Out a Chicken Coop: What you need to know